Cloudflare
Cloudflare is a company that provides a content delivery network (CDN), internet security services, and distributed domain name server (DNS) services. Here at Globe Runner, one of our primary uses for Cloudflare is speed tests.
So what is Cloudflare?
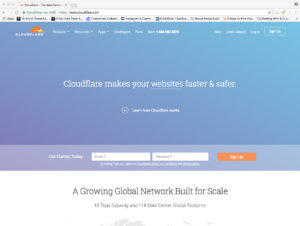
Cloudflare doubles as a couple of things. Once you’re at “Cloudflare.com”, hover over the “Products” page. While you are there, the drop down menu will show you all sorts of notes on the services that Cloudflare provides.
In the drop down menu, you will see feature such as:
- Load balancing
- Web optimization
- Security
- CDN
The two most important things Cloudflare provides are CDN and security. Cloudflare was originally developed as a security based system. It would act as a DNS filter.
If you look at our process flow, it comes after “DNS Information Track Down”. In order to complete a Cloudflare CDN check up, DNS information must be accessible and ready to be used.
What is a CDN?
Any user that visits a website can be at any location in the world, and our website can be at a completely different location in the world. For example, the server is in Florida, the website visitor in Dallas.
What CDN does is it picks up the website server, fakes it so its as close to user as it possibly can get it within the network. It is reducing the amount of time it takes for a website to load.
All of this is done through DNS records. We should have access to DNS zone website addresses. We are going to change where the DNS records are housed.
Normally, they are housed at the registrar. Now, we will move them to Cloudflare.
How do we actually do that?
- Go to www.cloudflare.com
- Press “Log In” in the top right corner
- You can get the requisite information in 1Password
- You land on a dashboard
- In this dashboard, it asks you to select a website to work with
Important to note: There are varying levels of performance plans inside Cloudflare. By default, every client gets the “free” website version. Every tier after that is a cost to the client.
If I want to add a new client:
- In the upper right hadn corner, click the “Add Site” button
- Enter a domain name inside of the box
- Click “Begin Scan”
Important to note: No HTTP(S), just enter the domain
After you begin the scanning process, Cloudflare will review public DNS information. Cloudflare will now review all of the public DNS information that it can find.
You are going to see a lot of records inside here that are not live. The most important ones are:
- The “A” records
- The “MX” records
An Old Friend
We are now going to bring out www.IntoDNS.com again
- Go to www.IntoDNS.com
- We type in the same domain that we typed into Cloudflare
- Cloudflare should see the same that IntoDNS is seeing
Note: We do the cross check to make sure to see if the MX records are the same in IntoDNS as they are in Cloudflare. Why is this so important? Because the MX records are what manages the email.
WP Engine
WP Engine will tell us the IP address we need to use. Follow these steps:
- Go to www.WPengine.com
- From the dashboard, click on the domain of your choosing
- In the section titled “Install Stats”, you will be able to view the IP address
- “Copy” the IP address
Back to Cloudflare
- “Paste” the IP address in Cloudflare
- Cloudflare will then ask you what type of plan you want to go with. Always select free website.
- Hit “continue”.
- It will then give you new server names that we need to use.
For example, if the domain name was registered over at GoDaddy, we would login to GoDaddy and adjust zone values to equal these values. It is important to note that there is a 24-48 hour turnaround time for Cloudflare changes to take effect.
Every registrar has a different process for changing nameservers (or NS). That’s why its important before we even start Cloudflare, we already have access to client’s registrar information. We do this on behalf of the client often because it’s often difficult for them.
Important:
There are always 2 “A” records in place for a website:
- The actual domain
- Another “A” record called “WW”
Note:
When working with DNS information, one wrong move can mess a business up. It is for this reason that Daniel does this step because of the hyper critical nature. Once DNS records are done, your Cloudflare set up is done.