WooCommerce Tax, Shipping, and Payment Gateway and its use.
 Due to the very fact that we are at this point in the website development process, all of the appropriate plugins should be installed. If you would like a refresher on plugins, click here. We are now officially at the tail end of the web development phase. This tutorial will explain how to get WooCommerce set up. We will also take a long look at taxes, shipping, and payment gateway settings.
Important note about taxes, shipping, and payment gateways:
In regards to taxes, shipping, and payment gateways, there is no guarantee that anything we cover here for one specific client will be exactly the same for another client.
Everyone has different requirements because every company does different things. For example, Muenster Milling sells dog food here in Texas. We have a client in California selling purses. We have lawyer clients selling legal services instead of tangible, physical products.
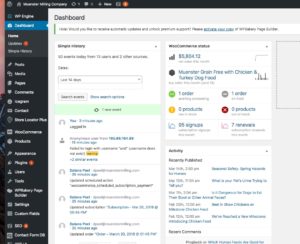
Let’s look at Muenster Milling’s back end
There’s 2 primary areas that deal with WooCommerce. Obviously, the first one is the one that says “WooCommerce” out to the left hand side. The other area is right under it, and it is titled “Products”.
Let’s go ahead and click on “Products”
 It will immediately take you to the “All Products” section. You will then see what a product page looks like. As you can see, this page is filled with all sorts of dog food products. There will generally be about 20 or so products per product page.
If you want to edit one of these products, click on the product. This will initially look very much like you are editing either a “Post” or a “Page.”
Go ahead and click on the 4th product, which is titled “Muenster Grain Free with Salmon Dog Food”. The important thing to understand in WooCommerce is the section titled “Product data”. The reason product data is so important is because how it highlights how that specific product gets sold.
Currently, the drop down menu to the right of “Product data” is set to “Variable product”. If you click on the drop down menu, you will see the other options a user can pick. These include “Simple product”, “Grouped product”, and other choices.
The top 2 most common product types you will see are:
- Simple product
- Variable product
Contracts
Whenever we do a contract with clients, we usually restrict them to only simple products. Otherwise, programming can begin to become quite difficult.
Variable Products
We are now going to cover variable products. When you are editing inside of a variable product, you are immediately going to notice 3 things:
- Tax status
- Tax class
- Coupons
If you click into the tax status drop down menu, WordPress asks you if you want to tax this particular product. The 3 options you are provided are:
- Taxable
- Shipping only
- None
Most products, once they are added inside of WooCommerce, always have “Taxable” selected as its tax status. They will also have “Standard” selected as the default tax class.
We will talk a little bit more about tax classes here in a minute. The 3 options a user is presented with in regards to tax class are:
- Standard
- Reduced rate
- Zero rate
We at Globe Runner almost never use a reduced rate.
Inventory
If I click on the “Inventory” tab, which is found right under the “General tab”, sometimes the clients will want to set specific, certain SKU numbers. WooCommerce does not really care about SKU numbers. This feature is really more for organization on the client’s end and if they themselves use SKU numbers for organizational purposes within their company.
Shipping
How much does the product weigh when boxed? That is the question we are trying to answer here. For example, Muenster Milling generally sells their products with a weight in its description. They typically have a 5 pound dog food option. Generally, Muenster will add a pound for the cardboard box. So, they enter the dog food in as a 6 pound package.
Dimensions are really important for some clients. For example, Muenster will enter in these dimensions but they don’t really utilize it for anything. Rather, they charge a standard, flat rate for just about all of their products. But in some cases, the client does care about the weight. Old World Stoneworks would be an example of a client that does care about weight.
Old World Stoneworks
Old World will ship products that range in between 1,000 to 5,000 pounds. So not only is the weight important, but also the length, width, and height. We might even need a specialized shipping calculation programming put into place. This is something the end user will never need to see. This is more for the developers to put together. Ultimately, all of those plugins and special programming focus primarily on weight and dimensions.
Shipping Class
The next option you will see is “Shipping Class”. In the event that this particular product is shipped in a weird way, we refer to this option. For example, 9 times out of 10, a company ships products through UPS. Let’s say for some odd reason you send a product with FedEx. This would be an example of a time to look into shipping class.
WooCommerce
Let’s start by hovering over “WooCommerce”, and click on “Settings”. Once you’re in Settings, there’s a bunch of tabs at the top of the page. Go ahead and click on “Tax”. You will then see a bunch of tax options.
Note:
If for some reason during the website development process someone skipped down to this area, and installed the plugin found in 3.7 and moved on, the developer that is working on this project needs to procedurally, tab by tab, make sure they have the settings the way they want them to be.
For example, “Products” feeds off of the “General” tab, and “Taxes” feeds off of the 2 tabs before them. It’s a waterfall effect.
Let’s resume:
So now let’s look at the tax options in here. A lot of these options are pretty straight forward. You should:
A) Go inside each of these tabs, especially “Tax”, and make an educated assumption about what needs to go in there.
A lot of times, clients aren’t thinking about this stuff. So, they don’t provide you a lot of information. A developer’s sole role is to take a general idea and try to flush it out. With that said, once the system is done and generated, a developer can explain and walk a client through their processes.
In the “Tax” tab, let’s look at the option “Prices entered with tax”. If Muenster gives us a bag of dog food and tells us that the price is $30, we can make the educated assumption that we should select the option of “No, I will enter prices exclusive of tax.”
B) The most important piece here is how to enter in the standard rates. While you are in the “Tax” tab, click on “Standard rates” which is found to the right of “Tax options”. 9 times out of 10 a client will tell us that they only ship to the continental United States.
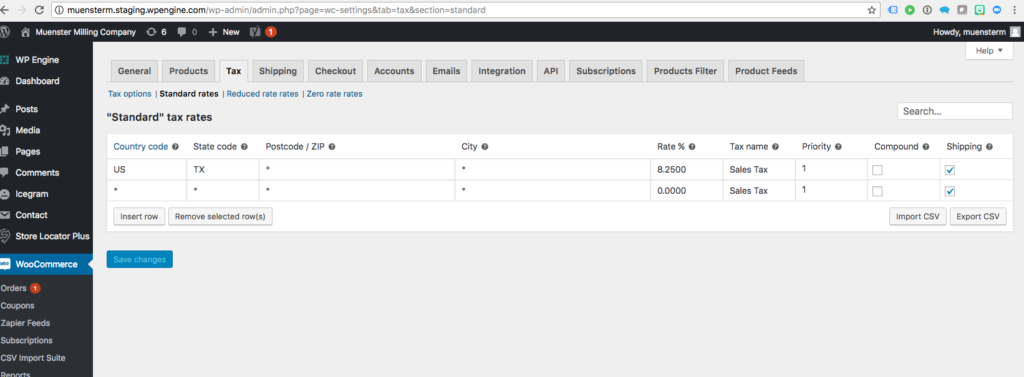
Go ahead and enter in your tax rates based off of your region. You should then be good to go. The important thing is that you type in the country code, which is “US” and the state code, “TX”. Whenever you see an asterisk, that is just a code name for “wild card”.
For “Reduced rate rates” and “Zero rate rates”, our defaults are perfectly fine so you don’t have to mess with any numbers in there. “Standard rates” are the only rates you will have to do anything to.
Shipping
9 times out of 10, Globe Runner clients will ship to the continental United States. At this point, we need to know from the client what company they use whether it be UPS, FedEx, or someone else.
Sometimes, clients want to charge a flat rate across the board. This would be the easiest route to go. Sometimes the client wants to charge different shipping rate than what they got from Fedex or their shipping provider.
A lot of “product” clients like the flat rate option. A “product” client is selling something such as purses or bracelets.
Where to go next
Go ahead an click on “Add shipping zone”. 9 times out of 10 that zone will be the United States. It will then ask you to give it a name. We will go with “United States”. It will then ask what “Zone regions” you would like the product shipped to.
It will also ask you what methods of shipping you would like to utilize. Think of the shipping zone as where do you want to ship and think of the methods as how to ship your product
Payment Gateways
Now for the hard part. This is the last thought an e-commerce client would think about. Payment gateways are a financier. Whenever you slide your credit card through something, that’s a payment gateway.
A payment gateway for the internet is typically something like Authorize.net, PayPal, Square, Blue Pay, Stripe, and other similar companies. Those require a plugin and a contract pre-existing with the client and payment gateway. They talk about fees and rates at that point.
Typically, the credit card company gets a small cut anytime you sell a product with them. We will then get a plugin and an API key. Inside of the WooCommerce area, underneath the check out option, once you’ve gotten the plugin and installed it, you can go to check out and explore the various options. Enable what you would like to enable. Enter in the API keys. You will need a plug in to do this. Please use a WooCommerce approved plugin to do this.